Building your first smart home doesn’t require spending thousands of dollars. With smart technology becoming more affordable, you can create a fully functional smart home starter kit under $200. This guide walks you through selecting the right devices, setting them up correctly, and maximizing every dollar spent on your home automation journey.
Why a Smart Home Starter Kit Matters for Beginners
A smart home starter kit gives beginners the essential foundation without overwhelming complexity. Rather than buying random devices, a strategic approach ensures your devices work together seamlessly. The best budget smart home automation combines reliable hardware with easy-to-use software. Starting with a clear plan helps you avoid purchasing incompatible products that create frustration and waste money.
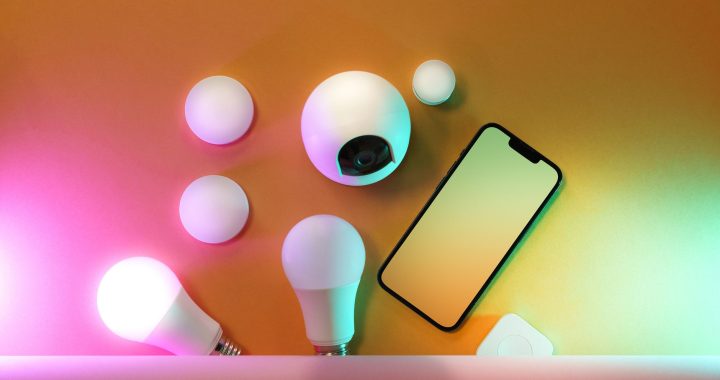
The Complete Hardware List: Under $200 Total
Here’s exactly what you need and where costs break down:
- Smart Hub/Speaker: Amazon Echo Dot (5th Gen) – $40-50
- Smart Lights: Wyze Bulbs 4-pack – $25-30
- Smart Outlet Plugs: Teckin Smart Plugs 4-pack – $20-25
- Smart Thermostat: Wyze Thermostat – $40-45
- Door/Window Sensor: Wyze Contact Sensor 2-pack – $15-20
- Motion Sensor: Wyze Motion Sensor – $15-20
Total Estimated Cost: $155-190
This configuration covers the four main smart home areas beginners need: lighting control, appliance management, temperature automation, and basic security awareness.
Step-by-Step Setup Guide for Cheap Smart Home Setup Beginners
Step 1: Start With Your Smart Hub
Begin by setting up the Echo Dot first. This device becomes your command center. Download the Alexa app on your smartphone, create an Amazon account if needed, and connect the Echo Dot to your home WiFi network. Place it in a central location like your living room or kitchen for best performance.
Step 2: Add Smart Lighting
Smart bulbs represent your most visible smart home upgrade. Remove one bulb from a lamp or ceiling fixture, screw in your Wyze smart bulb, and add it to the Alexa app. You can now control brightness and color from your phone or voice commands. Start with one room to test the system before expanding.
Step 3: Install Smart Outlets
Smart plugs control any device that plugs into a wall outlet. Plug your coffee maker, fan, or television into a smart outlet, then add it to Alexa. This lets you turn devices on and off remotely or create schedules. For example, automatically turn off your TV after 30 minutes of inactivity.
Step 4: Set Up Temperature Control
The Wyze Thermostat connects to your existing heating and cooling system. Follow the included instructions carefully, as thermostat wiring varies by system. Once installed, control your home temperature from anywhere using the mobile app. Program different temperatures for different times of day to save energy and money.
Step 5: Add Security Sensors
Door and window sensors alert you when entry points open. Window sensors detect if a window opens unexpectedly, while door sensors notify you whenever someone enters. Motion sensors trigger lights automatically when movement is detected, creating convenient hands-free automation.
Installation Timeline Expectations
First Two Hours: Unbox everything and download necessary apps. Set up your Echo Dot and connect to WiFi. Your foundation is ready.
Hours Two Through Five: Install smart bulbs and plugs throughout your home. Test voice commands and app controls. Most people complete this phase in one afternoon.
Hours Five Through Eight: Install your thermostat carefully following instructions. Add door sensors and motion sensors to key locations. These require more precision but remain straightforward for beginners.
Hours Eight Onward: Create routines and automations. Program your thermostat schedule. Test all devices together to ensure they function as intended.
Maximizing Functionality on a Budget
Create helpful routines that combine multiple devices. For example, set a “Good Morning” routine that gradually brightens your lights, adjusts temperature to your preference, and reads today’s weather. A “Goodnight” routine can lock doors, dim lights, and set your thermostat for sleeping.
Focus on affordable smart home devices that serve multiple purposes. A smart plug can control any plugged-in device, making it extremely versatile. One motion sensor can trigger lights in a hallway or bedroom.
Common Beginner Mistakes to Avoid
Don’t buy devices from multiple incompatible platforms. Stick with Alexa-compatible affordable smart home devices to avoid confusion. Don’t place your hub near metal objects or in corners, as this weakens WiFi signal. Don’t skip reading your thermostat manual carefully, as improper installation causes system failures.
Next Steps for Your Smart Home Journey
Once your budget smart home automation system runs smoothly, consider adding cameras, door locks, or robotic vacuums. Your initial investment creates a strong foundation for future expansion. Begin with this smart home starter kit under $200, master the basics, then expand based on your specific needs and interests.